My Photography Equipment: Everything You Need to Know About What I Use

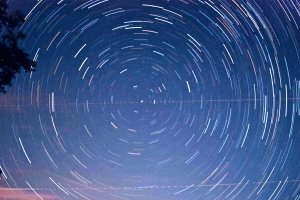
Throughout the years I have developed as a photographer. As I matured as a photographer my equipment has gotten better. My first DSLR (digital single-lens reflex) was a Nikon D60. This was and still is an outstanding camera; however, currently I have become more interested in videography which is why I purchased the Nikon D5100. Along with the camera I have an 18-55mm and 55-200mm lens. The D5100 has a 1080p video mode that allows you to take high quality videos. Another reason I upgraded to the D5100 is because of its ability to have an internal interval timer that takes photos on a set time frame. This ability is very useful in time lapses.

In addition to my camera, I have other pieces of equipment such as tripods and polarizers that enhance the overall quality of my images. Tripods create steady shots and polarizers eliminate glares and reflections caused by the sun and weather conditions. See my post about polarizers here: https://mcgeephoto.wordpress.com/2013/11/23/polarizers-why-you-should-have-one/

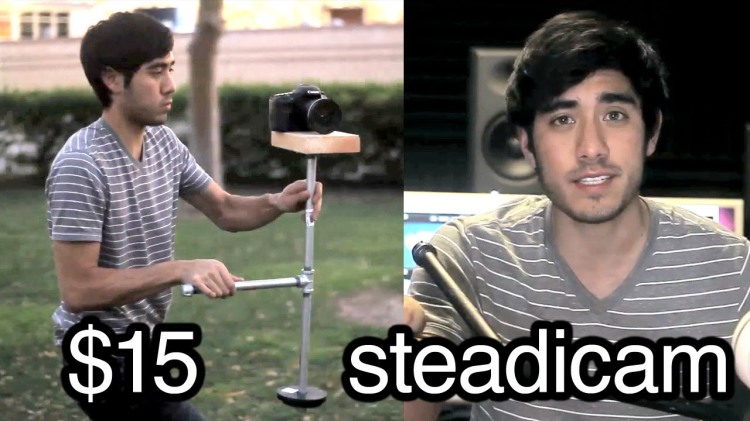
Lastly, over the years I have made my own photography rigs that also enhance the quality of the images and videos I produce. Recently, I made a DIY steady cam that allows you to get a sweeping and floating like shot while filming. See my post about my DIY steadicam here: https://mcgeephoto.wordpress.com/2013/11/25/diy-steadicam-tutorial/

DIY Steadicam Tutorial

Have you ever wondered how professional filmmakers get a perfect and smooth glide to their shots? Using a piece of equipment called a “steadicam”, filmmakers can achieve incredibly smooth clips that provide a visually appealing effect. For only $15 and a couple hours of your time, you too can create a steadicam for your home movies.

Check out this step by step video on how to make your own steadicam: http://www.youtube.com/watch?v=6NDsEFy5Iww

Steadicams use the dispersion of weights in order to counter the camera’s weight. This creates a smooth motion. Some professionally made steadicams run as high as $500.

steadicam

Personally, I built this rig and it works very well. I had some of the materials already too, so it didn’t cost that much to make. After assembling the steadicam, I mounted my camera on to it and got a feel for how it wields. I recommend testing it out and fine tuning it to your liking before using it on your personal videos. Making your own steadicam is efficient and effective for any low-budget filmmaker and aspiring cinematographers.

Polarizers: Why You Should Have One

Before my adventure out west, I knew I would be taking a lot of photos outside. Additionally, I knew I would be taking pictures of lakes, rivers, and skies in a majority of my shots. Knowing this, I decided to obtain a polarizer that mounted on my lens. Polarizers are used to eliminate glares (especially on water), saturate colors, and enhance colors found in the skies (blues and whites).

In about 90% of my photos I took on my adventure, a polarizer was used. According to Bestbuy’s description, “This circular polarizer features high-quality optical glass that helps remove unwanted reflections from nonmetallic surfaces, such as glass and water, for clear, detailed photos”. You can get a polarizer from Bestbuy using this link for only $19.99: http://www.bestbuy.com/site/55mm-circular-polarizer/1048555.p?id=1218213534303&skuId=1048555&st=polarizer%20&cp=1&lp=1

Notice the vibrant colors and lack of glare

Notice the vibrant colors and lack of glare

Some tips for buying polarizers:

Make sure the polarizer size corresponds to your camera lens’ size. Just because you have a 55mm lens doesn’t mean you should buy the 55mm polarizer. This is because the polarizer screws into the grooves just outside the glass of the lens. On the bottom of your lens there is a number value next to a circle with a cross through it. This is the size of the polarizer you will need to properly fit your lens. My 18-55mm lens has the number 52 next to the circle with the cross. This means I would have to buy a 52mm polarizer.

Make sure you do not screw on the polarizer too tight. Gently place the polarizer on your lens until it is a comfortable fit. If you screw it on too tight, get a rubber band, twist it around the polarizer for  an extra grip, in order to loosen it.

Make sure you test the polarizer. Get comfortable using it. Play with how much to focus it in order to get the optimal shot. Also, don’t be afraid to take multiple shots with different polarizer settings.

For more information on polarizers visit: http://improvephotography.com/331/polarizer-filter-photography/ 

Rule of Thirds

In this post I would like to discuss the rule of thirds. This concept and method is very important for photographers and filmmakers alike. The purpose is to create a compositional balance between the subject and surrounding space.

When looking into your viewfinder, establish your point of interest of subject. Darren Rowse states, “The basic principle behind the rule of thirds is to imagine breaking an image down into thirds (both horizontally and vertically) so that you have 9 parts”. Then using your imaginary grid, divide the space and subject, keeping your subject on a third of the “grid”.

Implementing this method in your photography and films will provide a visually appealing composition that will naturally flow with the viewers eyes. Check out Darren’s article on the rule of thirds: http://digital-photography-school.com/rule-of-thirds

My Photography Expedition out West

Over the summer I got the photography experience of a lifetime. Two of my friends and I got the opportunity to travel to Wyoming and Montana to explore some of the most beautiful destinations in the world. During our 16 day adventure we traveled to multiple national parks that offered extraordinary opportunities for photography.

Our first stop was Yellowstone National Park. Yellowstone is home to geysers, flourishing wildlife, wild animals, and incredible vistas. At Yellowstone, bison roamed the open fields, elk wandered through the dense forests, and water majestically flowed down  rivers. Seeing the beauty of nature and wildlife and capturing it with my camera was truly an amazing experience. Here is Yellowstone’s information link: http://www.nps.gov/yell/index.htm

Elk

Our next stop was Grand Teton National Park. This park offered vast and towering  mountain ranges. We hiked many miles and found  hidden lakes right at the base of mountains, which provided remarkable landscape photography shots. Here is information on Grand Teton National Park: http://www.nps.gov/grte/index.htm

Grand Teton National Park

Lastly, we traveled to Glacier National Park. This park had it all. Located at the uppermost part of montana and the United States, Glacier is known for its bears and wilderness area. Although we didn’t see any bears, we had a very close encounter with big horned sheep and moose. Our stay at Glacier was only one day long; however, we hiked nearly 15 miles and got to see a lot the part had to offer. Glacier provided the best landscape and animal shots with its tranquil lakes and fearless wildlife. Here is a link to Glacier National Park: http://www.nps.gov/glac/index.htm

Traveling out west allowed me to take thousands of pictures that I will cherish for the rest of my life.

Glacier National Park

Star Trail Photography Tutorial

Capturing ‘star trails’ can be a very challenging yet rewarding task. My steps will provide correct methods that you can use to create a astounding image.

First you will need two key pieces of equipment. This includes: a camera that can take long exposure images and a tripod.

After collecting your equipment, find a spot away from street lights and light pollution. Next, mount your camera on your tripod and point it at the sky. For a star trail image that revolves around one star, direct your camera at the star “Polaris” since the earth rotates around that star. Next, set your camera to a 20-30 second shutter time, an f-stop of 5.6 or 8, ISO 800, and infinite focus mode. These settings are subject to change pending on your location, camera, and personal creativity. A similar method is described in this article: http://photoextremist.com/star-trails-tutorial

Now it is time to shoot. Since I have the Nikon D5100, I can set the interval timer so that the camera automatically takes a photo every X amount of time. If your camera does not have this mode, you will have to manually press the shutter release every X seconds.

When you have a sufficient amount of photos (200+) you can conclude your time taking photos. After importing the photos into photoshop, layer them on top of each other using the blending options (this video shows how to do this http://www.youtube.com/watch?v=tMERM7qQ_Ng)My photo of star trails